


Blesta Extensions
Blesta is a software solution for Client Management, Automated Billing, Support System and many more functions. This solution is one of the preferred solutions in the market now.
Webhosting business domain is a highly competitive market, where innovations has to happen to survive. Your domain displaying
the hosting plans alone is becoming an old wine concept, where the website being a complete portal is marking the new technology.
Having a web based option for domain, your billing and support is fast becoming the new face in webhosting. Making orders,
handling billing and opening support tickets are thus made easy under one umbrella, with just a reachable click.
Blesta Billing Software helps just that, having the entire web hosting business organized and setup under one profile. You can
handle your orders, customers, billing and support in the most easiest and efficient method.
We Nirays Technologies where validating this and result was complete satisfactory. We where also able to create some extensions for this. The current extensions are:
- CPanel CSF
- CCAvenue Gateway
- Bitpay Gateway
CPanel CSF
CPanel CSF is an extension plugin for Blesta CPanel. This firewall plugin is used for unblocking firewall blocked IPs, using the help of cpanel and CSF in WHM servers in Blesta. This give an advantage to the user to NOT TO LOGIN to individual servers for solving unblock request. The Staff users of Blesta can unblock any IP from their Blesta login to which configured servers in CPanel module. The Client users can unblock the IPs to the server that they are associated to.
New Version
1.1 is the latest version and in this version it has the feature to control, if a client or staff is allowed to unblock any IP or just the IP that it is connected to.
[wpfilebase tag=file id=4 /]
Older Versions:
[wpfilebase tag=file id=1 /]
Installation and usage:
Download using the [wpfilebase tag=fileurl id=4 linktext=link /] provided above.
- Copy and extract the zip file to Blesta installations folder in server. in path <Blesta Installatons>/plugins

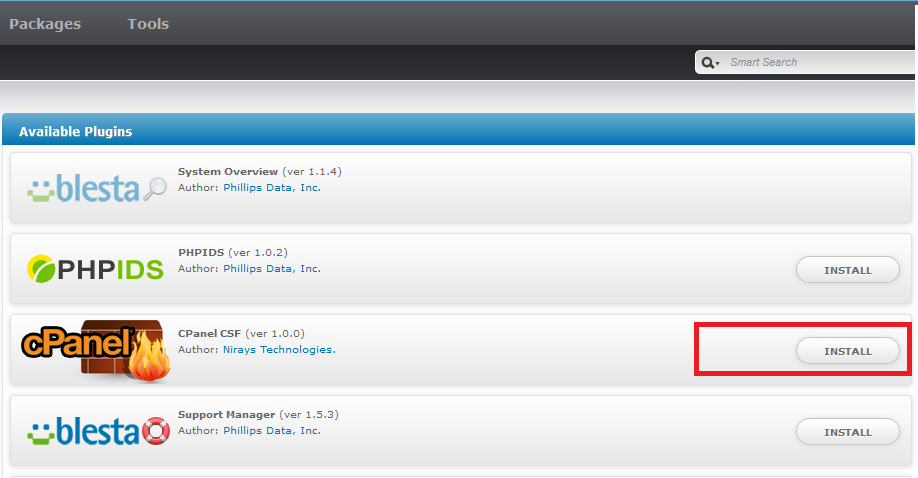
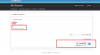
Install Cpanel CSF
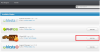
- In Staff Login Goto Settings->Plugins->Available and on Cpanel CSF click Install. Make sure that Cpanel module is installed prior to this installation.
Install cpanel csf


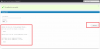
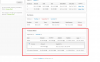
- New Unblock IP submenu Item under Tools menu is created.
- Staff user can click on Tools->Unblock IP and enter a valid IP in given area and select the server. The current IP is filled in the IP Text box.

Use CPanel CSF
- After this user will be able to Unblock by clicking Unblock Button.
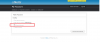
Unblock IP
Result of Unblock is given
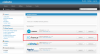
- Same Function is available for the Client, in Main menu Unblock IP.

Client unblock ip CSF

you may follow the discussion in Blesta forum here
CCAvenue Gateway
CCAvenue is the largest Payment Gateway in India today and currently powers more than 85% of the e-commerce merchants in the country. And we Nirays Technologies are resellers for CCAvenue Gateway

Secure Payments by CCAvenue
We have come up with a CCAvenue gateway for Blesta. CCAvenue Gateway can work with all INR related transactions. It will work with Orders, Invoice based and all the payments which are in INR.
-
- Installation
-

- Settings
-
- Transactions
-
- Payment
-
- Pay
-
- Redirection
-

- Bank options
-
- Failed Transaction
-

- Successful Transaction
Please contact us for any related queries.
Bitpay Payment Gateway

Bitpay is a payment gateway that allows you to accept bitcoin for your business. It decreases the risks associated with accepting bitcoins directly & has a simple pricing, with zero transaction fees and zero hidden charges.
This payment gateway module for Blesta allows you to pay using bitcoin. For this you need to have a Bitcoin wallet. For more information on Bitcoin visit Bitcoin.org and on more information about bitpay visit Bitpay.com
Install
1. Copy the zip archive to the non merchant folder. Eg: Blesta root folder -> components -> gateways -> non merchant
2. Unzip the archive, log on to the blesta admin page and install bitpay which can be found under settings ->payment gateway -> available -> bitpay.
3. Once you install, you need an API key which can be obtained from bitpay.com by registering as a merchant. It takes a couple of days to get this key once you register.
4. Set speed according to the setting in the bitpay account which can be found in bitpay website under order settings.
5. That’s it ! Now you can use bitpay for transaction and bitpay accepts a number of currencies. So choose your preferred currency from the list.
Making a payment
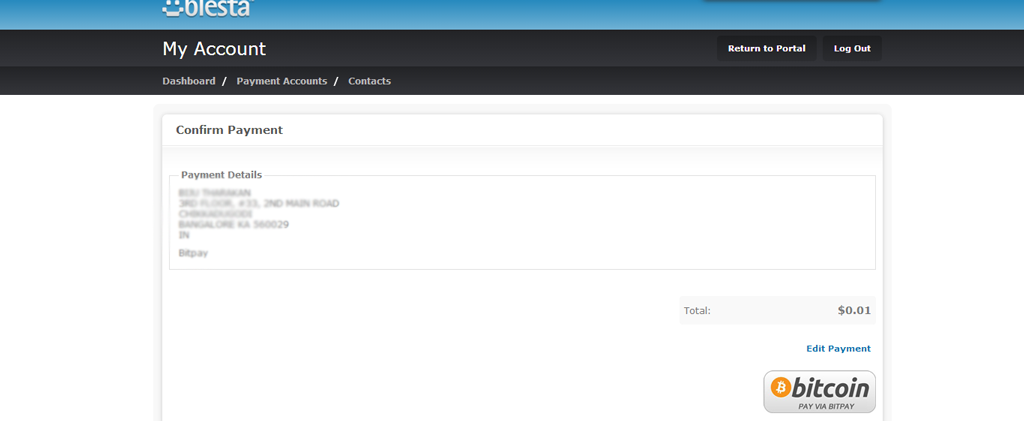
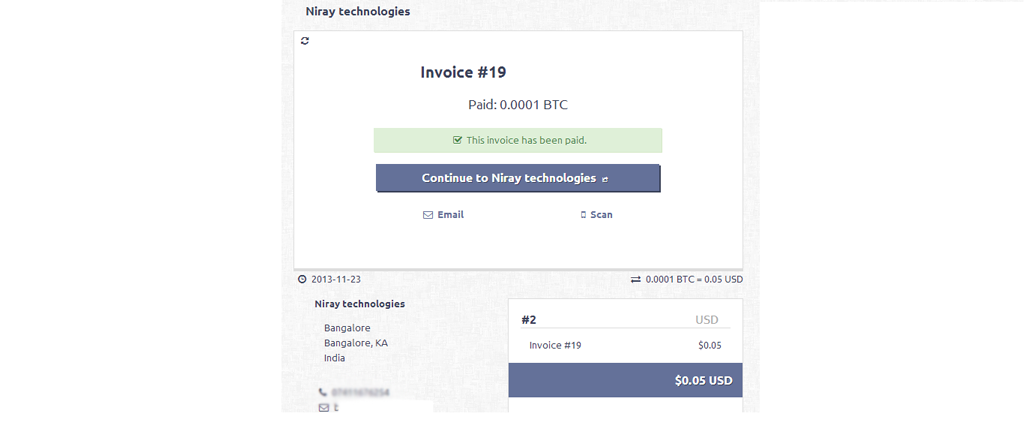
1. After choosing to pay an invoice use bitpay payment gateway, once you confirm it you will be taken to final confirmation page.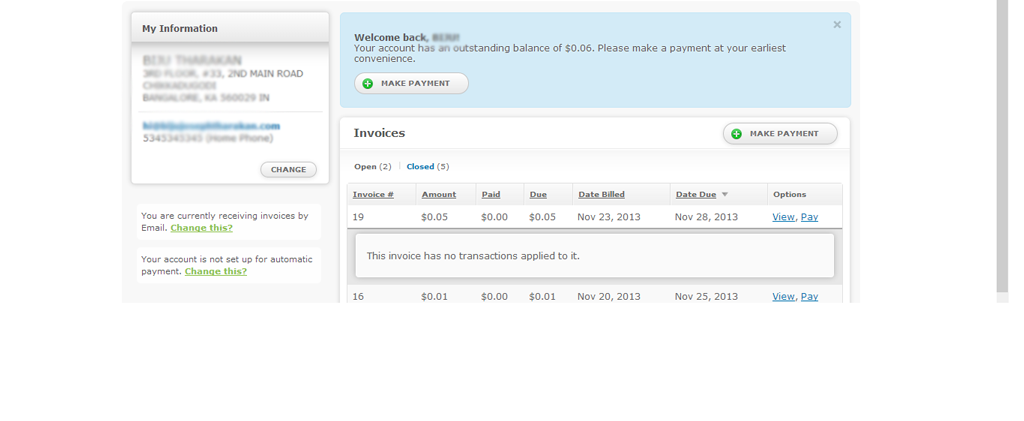
2. Click on bitcoin button and you will be redirected to bitpay website.
3. There are two methods to pay:
i) Click on view address and copy from there, go to your wallet and select ‘Send’ bitcoins. Now paste the address and the amount you want to send which can be seen on the invoice. That’s it. Click Send !
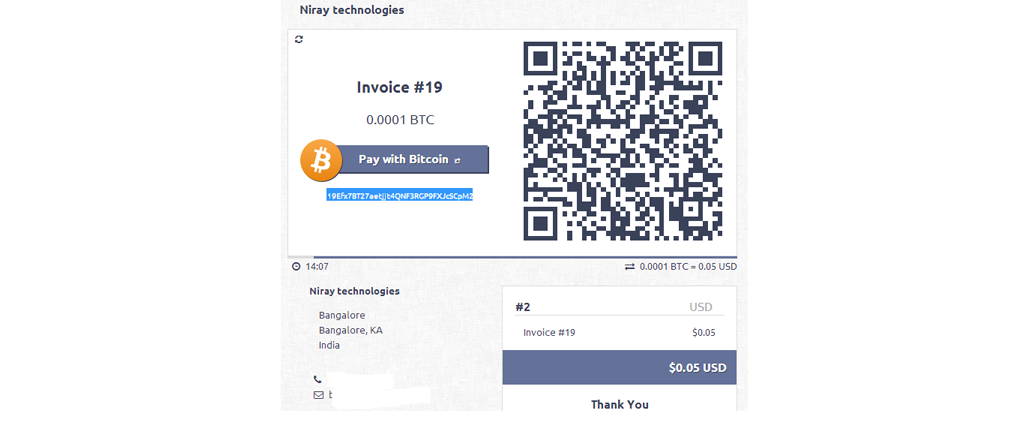
ii) Scan the QR code using Bitcoin wallet app in your phone. This will automatically insert amount and address to send. Now hit Send !
4. Once payment is received the invoice automatically refreshes. You can click on link on invoice to return back to the website.
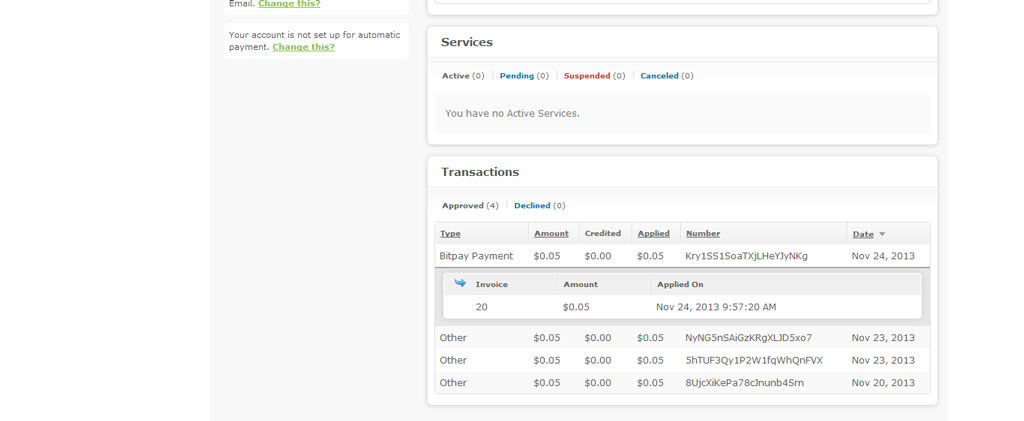
5. Payments take some time to get confirmed on the Bitcoin network. Once confirmed it will be applied to the invoice for which this payment was made.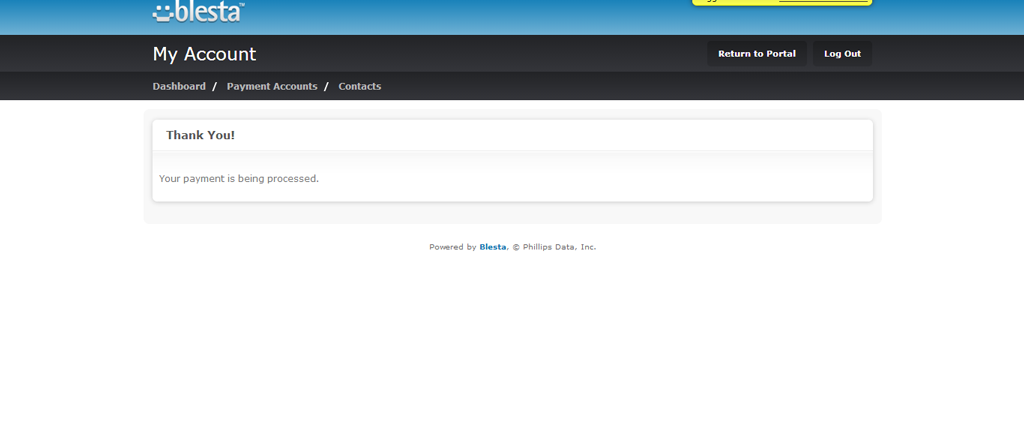
6. Once the payment is done it will show under pending state and email notification will be send for once it is complete.
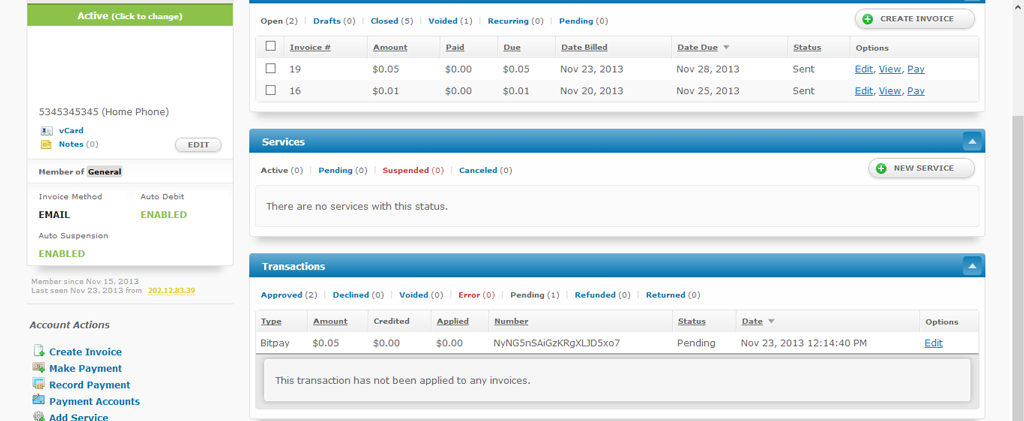
7. The transaction will be in approved state only when bitpay gives the ‘complete’ notification which might take up to an hour depending on bitcoin network.
Hope this helped you to setup the bitpay payment gateway for blesta. For more information read other articles on setting up payment gateway in blesta. This can also be found on Blesta.com website.
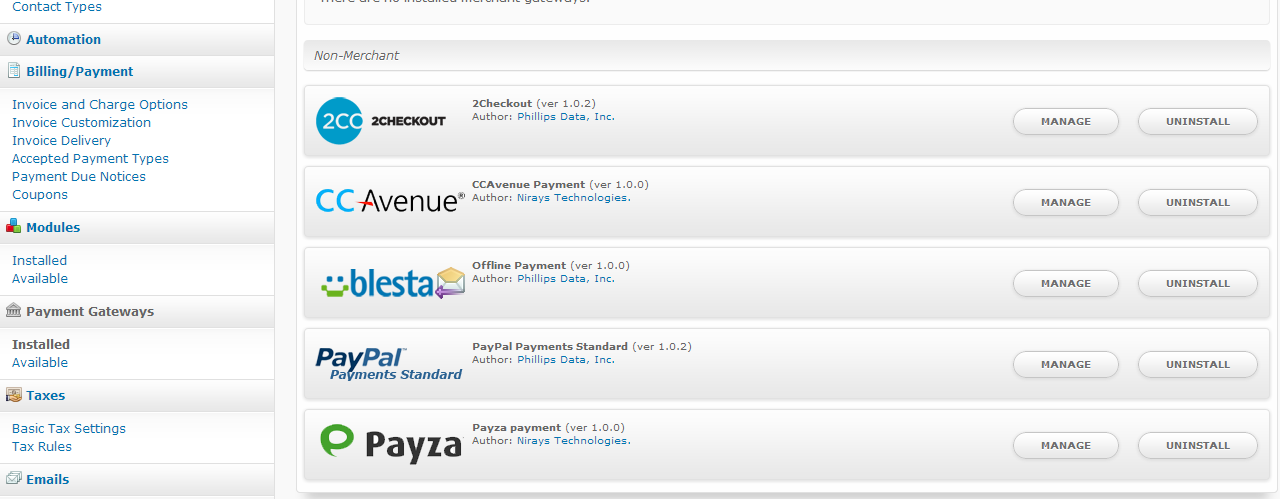
Payza Gateway

Install
1. Copy the zip archive to the non merchant folder. Eg: Blesta root folder -> components -> gateways -> non merchant
2. Unzip the archive, then log on to the blesta admin page and install Payza which can be found under settings ->payment gateway -> available -> Payza.
3. Once you install, you need an API key & Merchant id which can be obtained from sandbox.payza.com by creating a free account.
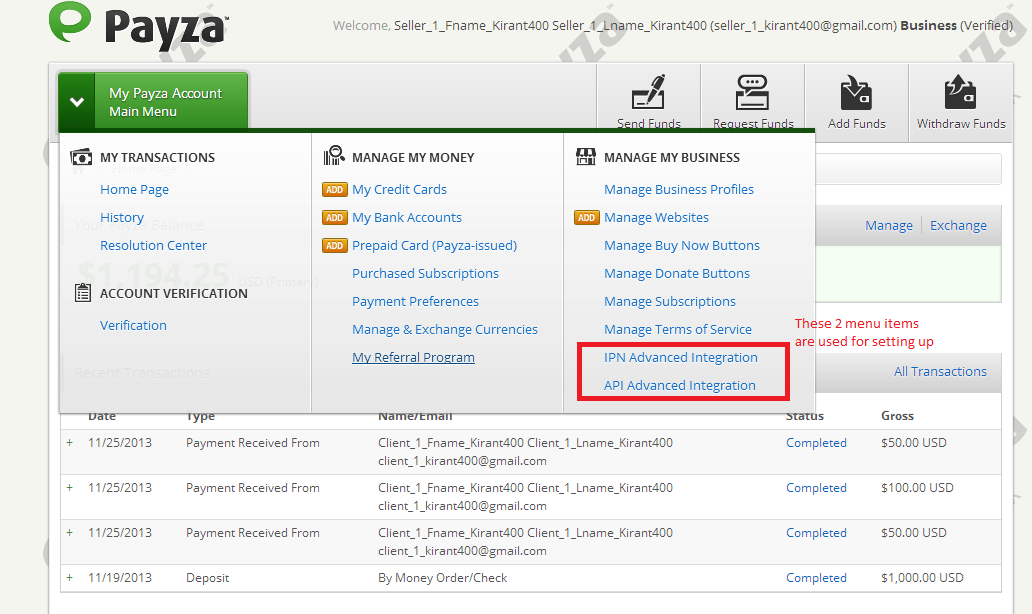
4. Choose an account type and add a new account . Click on newly created account and go to main menu. Please set up IPN advanced integration and API advanced integration.
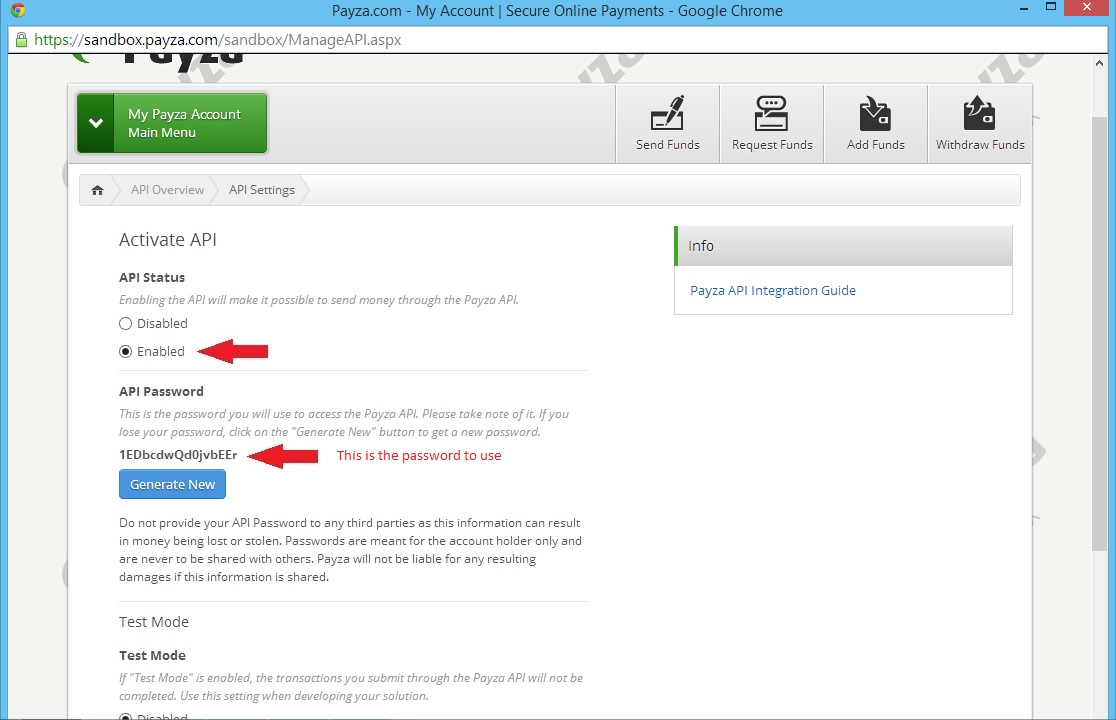
5. Enable the API status and you will get an API password. This is shown below:
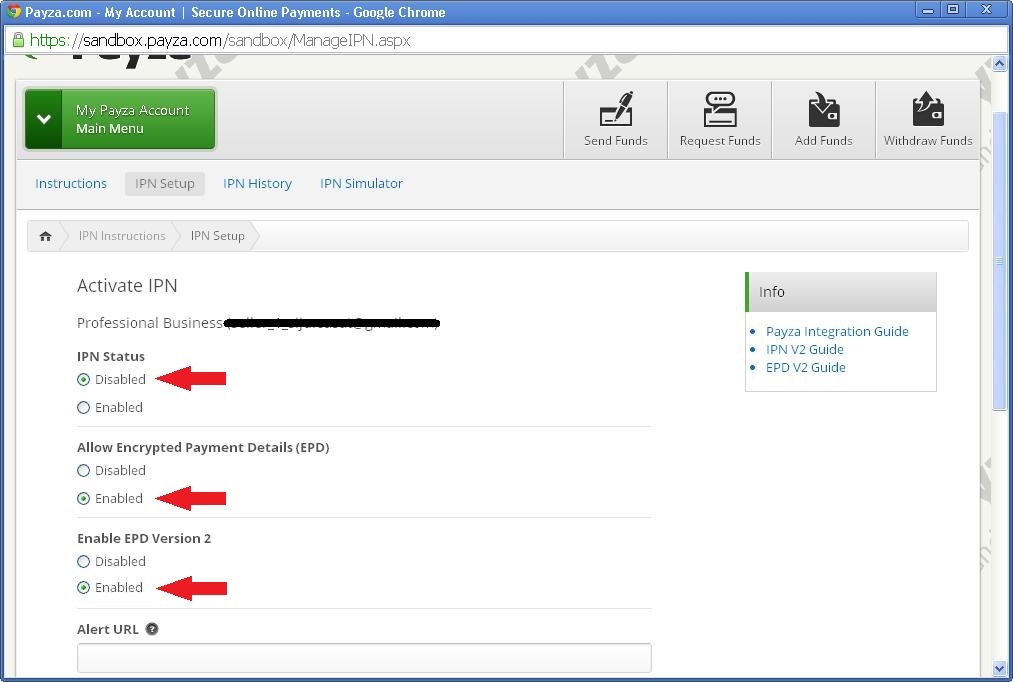
6. Under IPN integration choose the following options (IPN status: Disabled, Allow encrypted Payment details: Enabled, Enable EPD version 2: Enabled) as shown below:
5. After getting merchant id and api password, use it to set up the gateway options after installing payza in blesta. Enable sandbox mode only if you are testing.

6. That’s it ! Now you can use payza for transaction and payza accepts a number of currencies. So choose your preferred currency from the list.
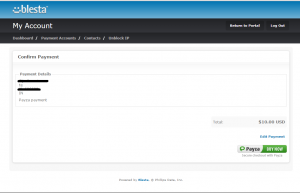
Making a payment
1. After choosing to pay an invoice use payza payment gateway, once you confirm it you will be taken to final confirmation page.
2. Click on payza button will take you to the payza website for completing payment.
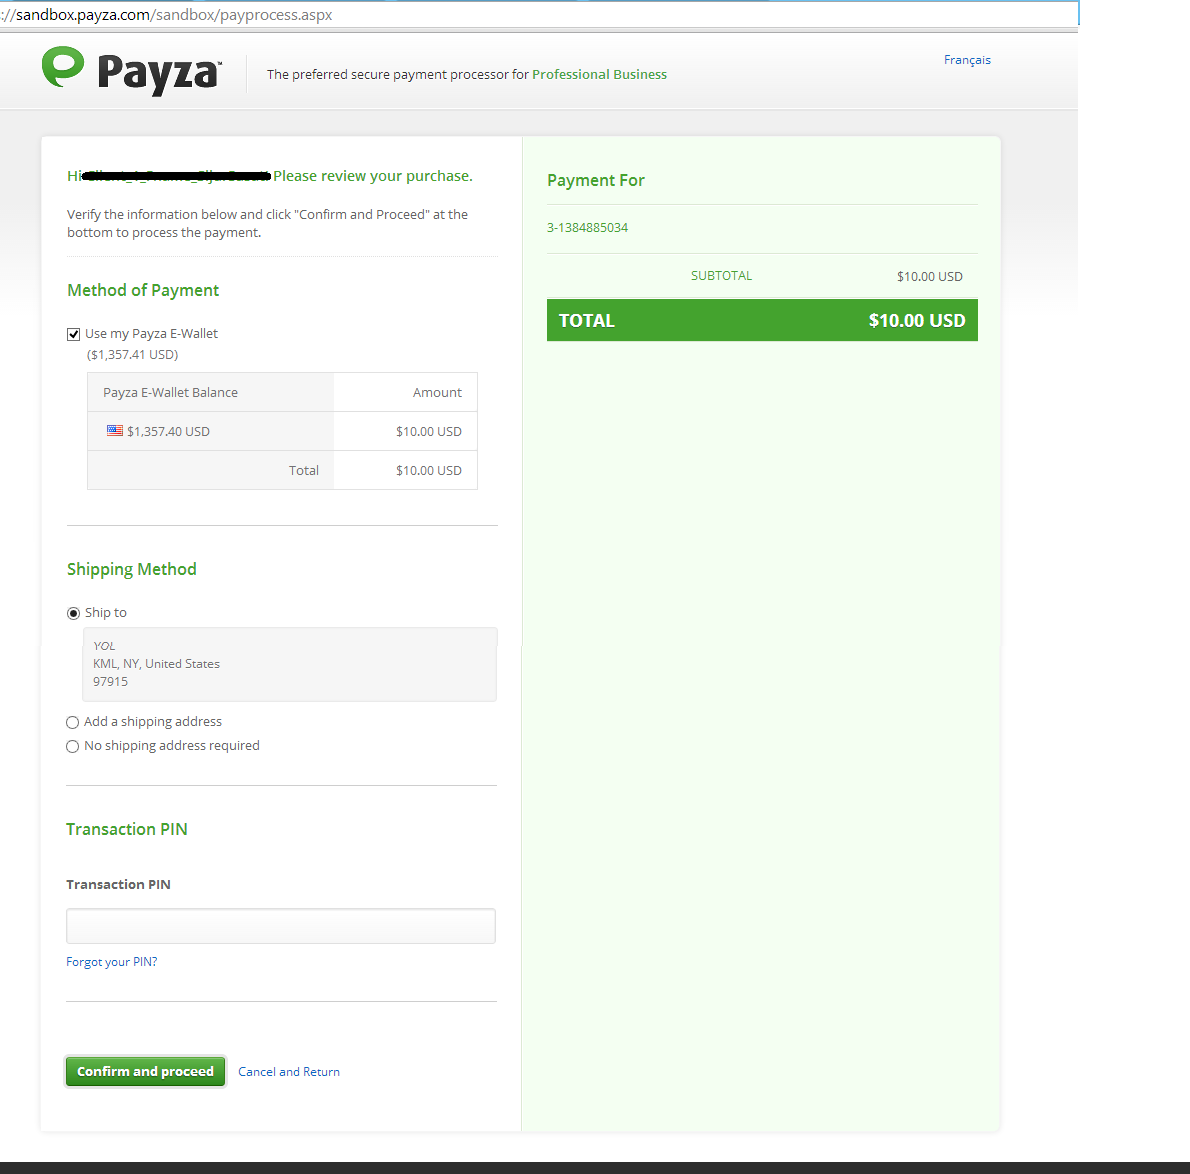
3. You have some options for choosing the payment method.
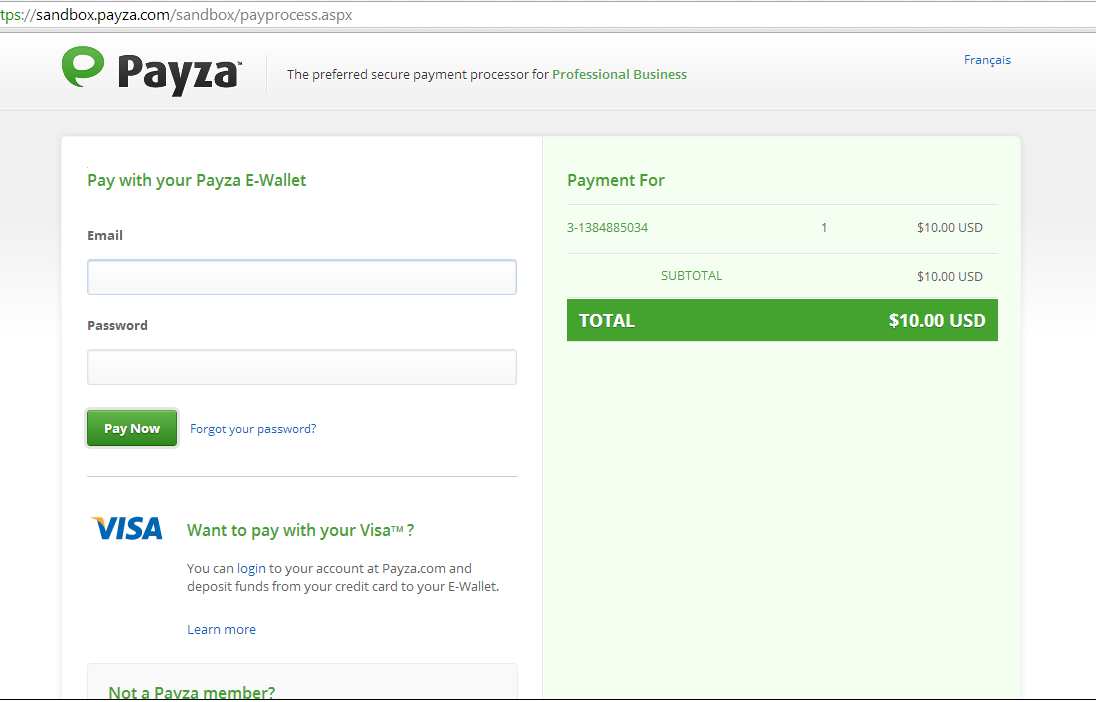
4. Choose your method of payment
5. After payment you will see a payment sent page and then will be redirected to account.
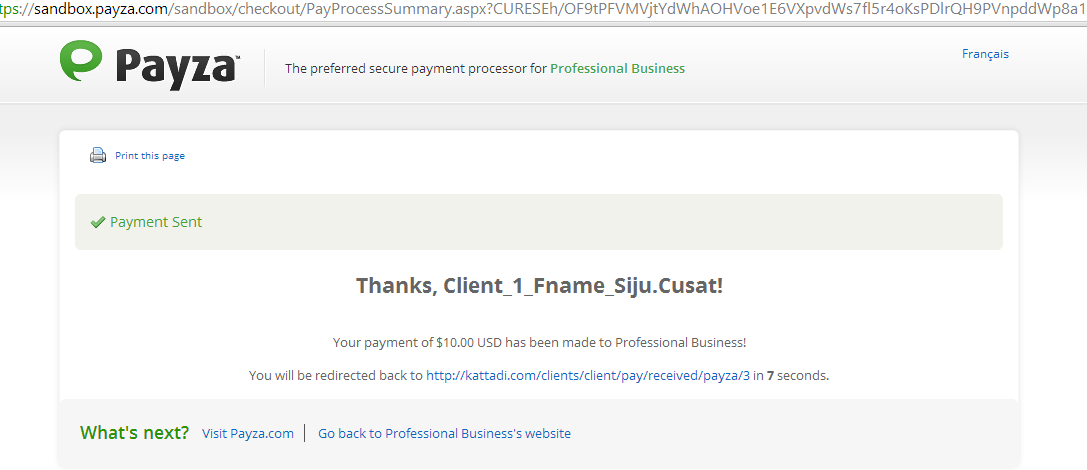
6. After redirection you will get a page as shown below:
7. If you go to your invoice page you can see that payment is processed and it is applied to the invoice.

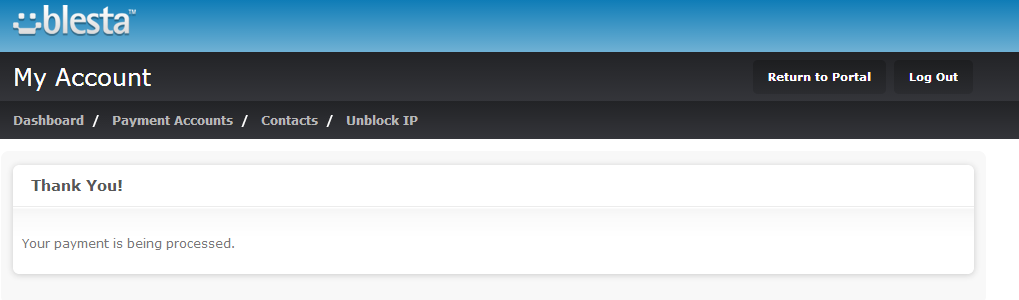
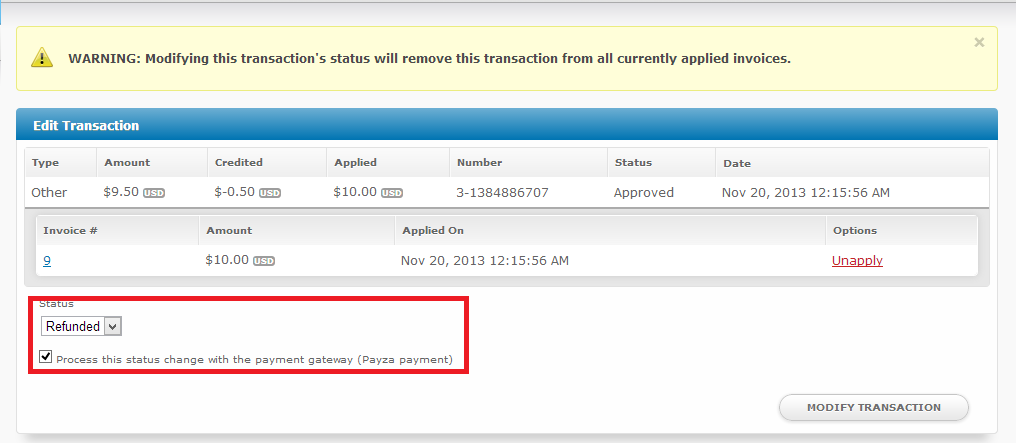
8. You can also refund the transaction by editing a transaction and choosing refunded. Also check ‘Process the status change with Payza gateway’.
9. That’s it.. Hope this helped you set up the Payza payment gateway!
For more information visit payza.com
Pagseguro Payment Gateway
![]()
PagSeguro is the complete solution for online payments, which ensures the safety of those who buy and sell on the web. Nirays Technologies developed Pagseguro payment gateway module for Blesta Inc. Nirays also developed the test server for testing the transactions since Pageseguro does not provide a Sandbox or testing account.
PayJunction Merchant Gateway

Used by tens of thousands of businesses across the country, PayJunction allows you to process payments and capture electronic signatures. Nirays Technologies developed PayJunction API and merchant gateway for Blesta Inc.
Disclaimer
While Nirays Technologies make every effort to deliver high quality products, we do not guarantee that our products are free from defects. Our software is provided “as is,” and you use the software at your own risk. We make no warranties as to performance, merchantability, fitness for a particular purpose, or any other warranties whether expressed or implied. No oral or written communication from or information provided by Nirays Technologies shall create a warranty. Under no circumstances shall Nirays Technologies be liable for direct, indirect, special, incidental, or consequential damages resulting from the use, misuse, or inability to use this software, even if Nirays Technologies has been advised of the possibility of such damages. These exclusions and limitations may not apply in all jurisdictions. You may have additional rights and some of these limitations may not apply to you